This DIY project is totally doable. It took me a few days worth of nap times, but doesn't require any special tools or skill.
Materials needed:
board (I used a 2" x 6" x 6' pine board (about $7 at Home Depot)
stain (I used Minwax Polyshades--love this stuff!--in Espresso Satin)
printer
pencil
ruler/straightedge/square
paint pen
hanging hardware
I started out with my 2"x 6" x 6' pine board.
Then I stained it with some stain that I already had (and love!)
This shade can get pretty dark, but with only one coat, it was perfect for me. I love how it really emphasized the grain and "movement" of the wood. Beautiful!
The next day I came back and started tracing the inch marks and numbers. (This was the most tedious part.)
First I had to measure off the inches. This plunged me into an unexpected decision: how long did I want each line. Some boards that I saw on Pinterest had all the lines the same size; others looked more like a ruler with different sized lines. I ultimately decided on the varied line lengths corresponding to 1/8, 1/4, 1/2, etc... (except each mark measured an entire inch rather than a fraction of an inch). And after experimentation, I made the foot marks 2" long, 1 and 2" were 1/2" long, 3" was 1" long, 4 and 5" were back to 1/2" long, 6" was 1 1/2", 7 and 8" were back to 1/2", 9" was back to 1", 10 and 11" was back to 1/2", and then I came back to the 2" long foot line. (That sounds really complicated! Just look at my finished product and hopefully you'll understand what I mean...)
I think that part took me almost an entire nap. Oh yeah, and I started the bottom of the board at 6" so that I could then hang it 6" off the floor. (Don't forget that adjustment!)
Then it was time for the numbers. First, you scribble the back side with pencil, so that the lead will transfer onto the wood. I'm not sure this is totally necessary since you're making an indentation anyway, but this part is pretty easy and I think the lead helped me to see the lines a little better.
Then you tape the numbers in place. This took more experimentation because everyone seemed to be doing theirs differently on Pinterest. Some had the numbers sideways, some right-side-up. Some had the numbers tighter to the side and some closer to the middle. In the end, I decided I liked the look of having the numbers read right-side-up when the board is hung vertically (instead of sideways like an actual ruler). I also decided I liked the numbers to sit right on the edge of their inch marking (rather than off the end of it). Take your time figuring out your preferences, because there really are so many options!
Then, pressing really hard, you trace each number. Thanks to the wood grain...and my hand feeling like it was going to fall off!...mine were far from perfect. But they merely needed to provide a basic outline for me to fill in with paint.
Once all that was done, it was time for the fun part--filling everything in with paint. Again, I had more choices. Most of the boards I had seen were either white or black letters/numbers...and I couldn't figure out which I wanted.
Finally, I decided on black, and simply used a black Sharpie, which I have tons of. It came out really good and I really liked it...until I pulled my face away and realized that the letters/numbers were barely visible since the stain is so dark.
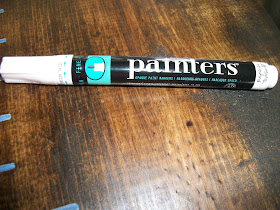
Sooo...I guess that made my decision for me. I made a "quick" stop at Walmart and picked up this white paint pen (the last one in white! whew!)...and retraced my steps (literally!)...
Much better!...
Then I sealed it with a thin coat of this Polyurethane spray I already had...
And then I attached the mounting hardware...(I was trying to do this on the cheap, using stuff I already had, and so I experimented with a few creative solutions before finding this picture hanger in my odds n' ends box.)
And whala! There it is at the top of our stairs. I love it! (Of course, once I got it up there, I realized that the mirror to the left of it--which was black--didn't not work anymore...so I took that down, gave it a couple coats of white paint, sanded the edges for a slightly distressed look, and then topped it with the polyurethane spray for a slightly yellowed finish like the old door.)


This looks great! Thanks for the tutorial. One question: how do you plan to mark your family's heights/names? Paint pen? What color? I know it's all just personal preference at that point, but I'm just curious what you plan to do. :)
ReplyDeleteKate